
COD BIOS Firmware Update Required: How to Fix It (2026)
Seeing “BIOS Firmware Update Required” in Call of Duty? This guide shows you how to fix the COD BIOS firmware warning on Windows 10 and Windows 11 by updating Device Health Attestation, the AMD chipset driver or Intel MEI driver and ME firmware, your motherboard BIOS, and the TPM endorsement key certificate.
Activision explains that this warning means your current BIOS meets the minimum security requirements, but a firmware update is recommended and might become mandatory. The checks apply to the TPM 2.0 and Secure Boot requirements used by Call of Duty: Black Ops 7 and Call of Duty: Warzone. See the official Call of Duty TPM 2.0 and Secure Boot guidance.
COD BIOS Firmware Update Required: quick fix checklist
- Enable the Windows Device Health Attestation service.
- Install the latest AMD chipset driver, or update the Intel MEI driver and model-specific ME firmware.
- Download and install the latest stable BIOS for your exact motherboard model.
- Install Windows TPM Diagnostics and retrieve the EK certificate.
- Verify that TPM storage and attestation report a ready status.
Step 1: Enable Device Health Attestation Service
Open Command Prompt as an administrator. To do this, search for CMD, right-click it, and choose Run as administrator.
Paste this command and press Enter:
reg add "HKLM\SOFTWARE\Policies\Microsoft\DeviceHealthAttestationService" /v EnableDeviceHealthAttestationService /t REG_DWORD /d 1 /fAfter that, paste this command and press Enter:
gpupdate /target:computer /forceNow, close the CMD window.
Step 2: AMD systems—update the AMD chipset driver
Open MSINFO32 from Windows Search and look for BaseBoard Product.

Go to Google, search for your motherboard model, and open the manufacturer's website.
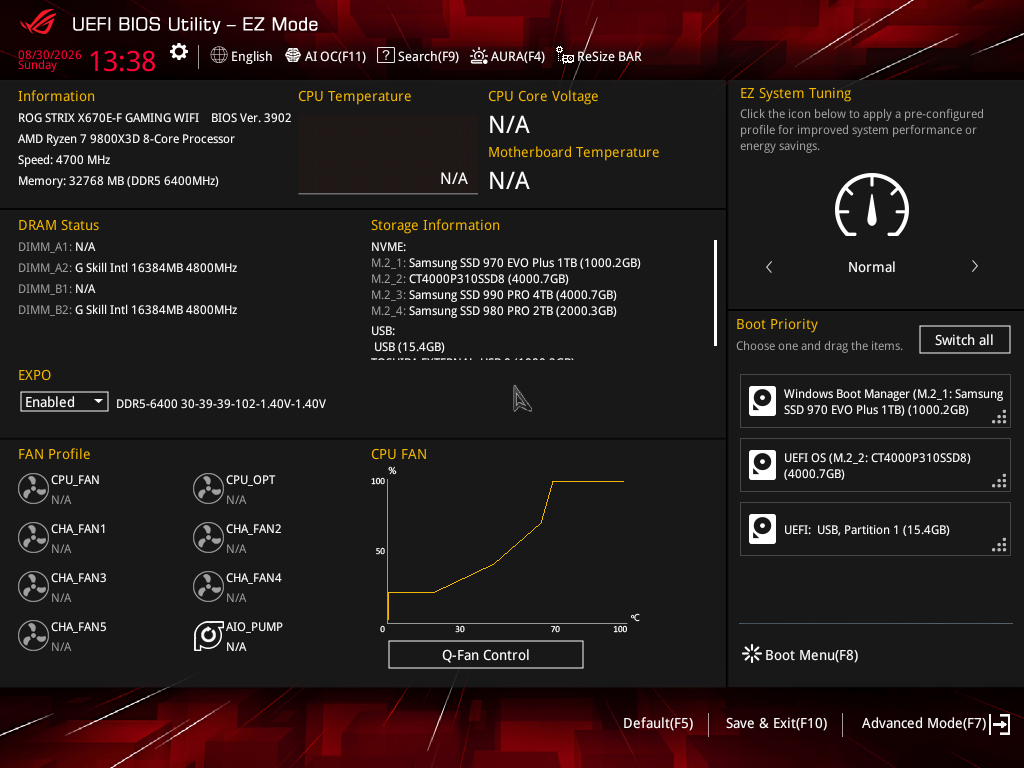
In this example, we're using an ASUS X670E Gaming WiFi motherboard.
Click Support, then select your operating system.
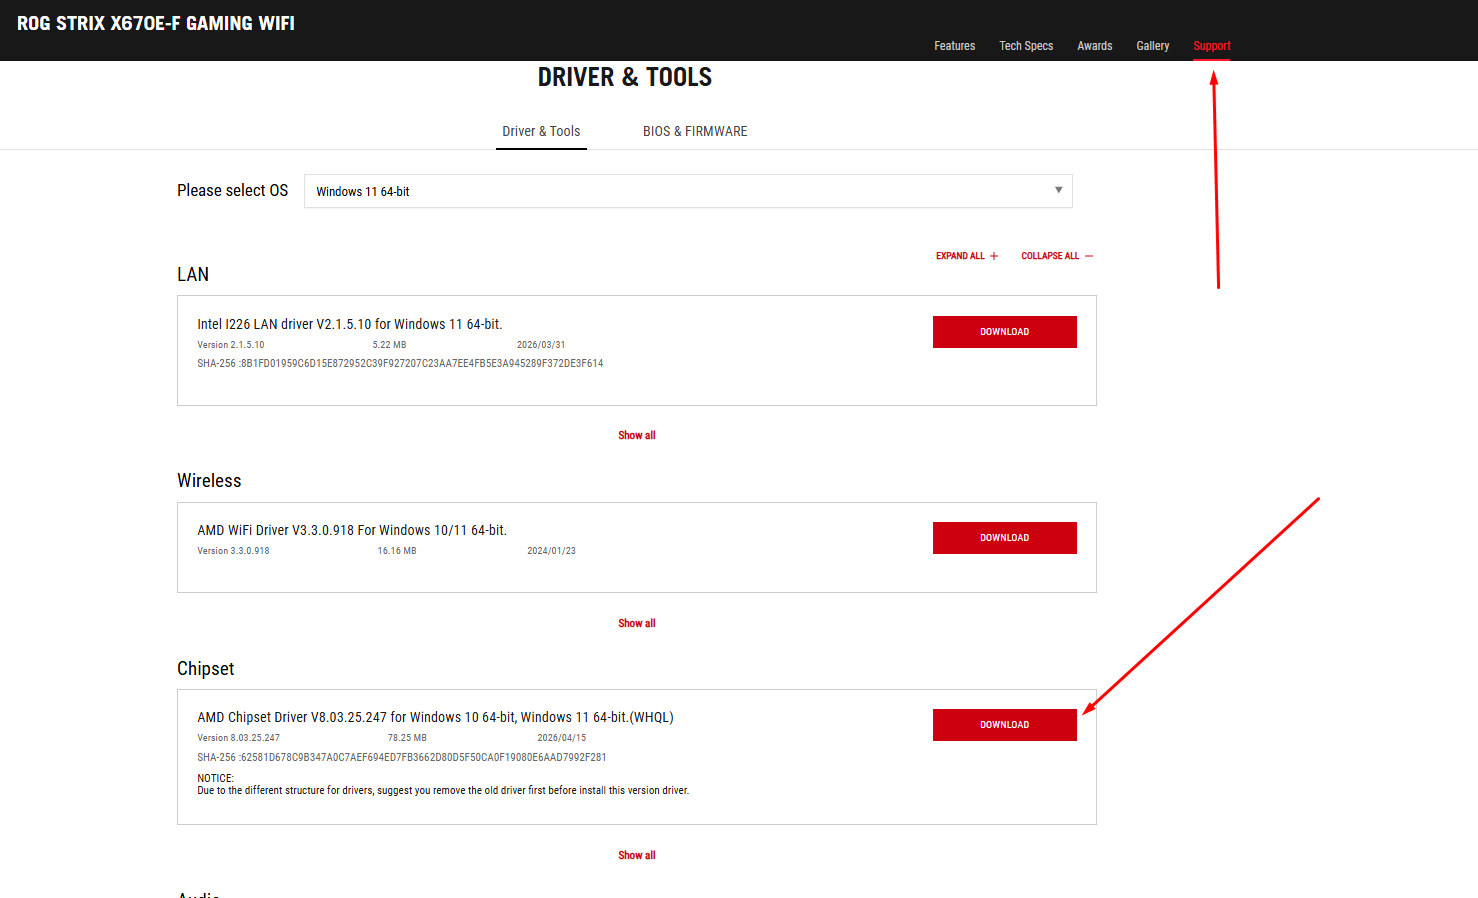
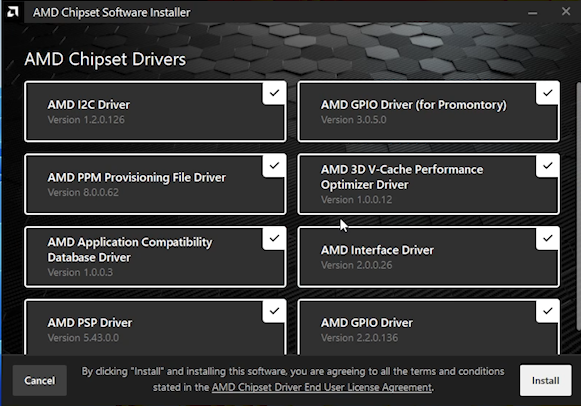
Download the chipset driver, extract the archive, and then run the installer.
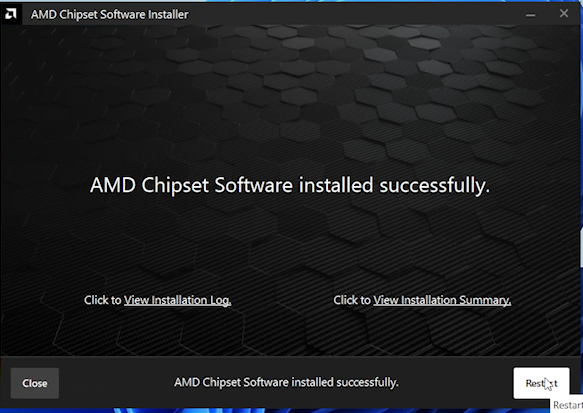
When the installation is complete, restart your computer and boot back into Windows.
Intel systems: Update the Intel MEI driver and Intel ME firmware
If your PC uses an Intel platform, open the support page for your exact motherboard or prebuilt PC model. Do not install Intel Management Engine firmware made for another system. Intel ME firmware is customized by each motherboard or system manufacturer, so there is no safe generic firmware package.
Install the Intel MEI driver first
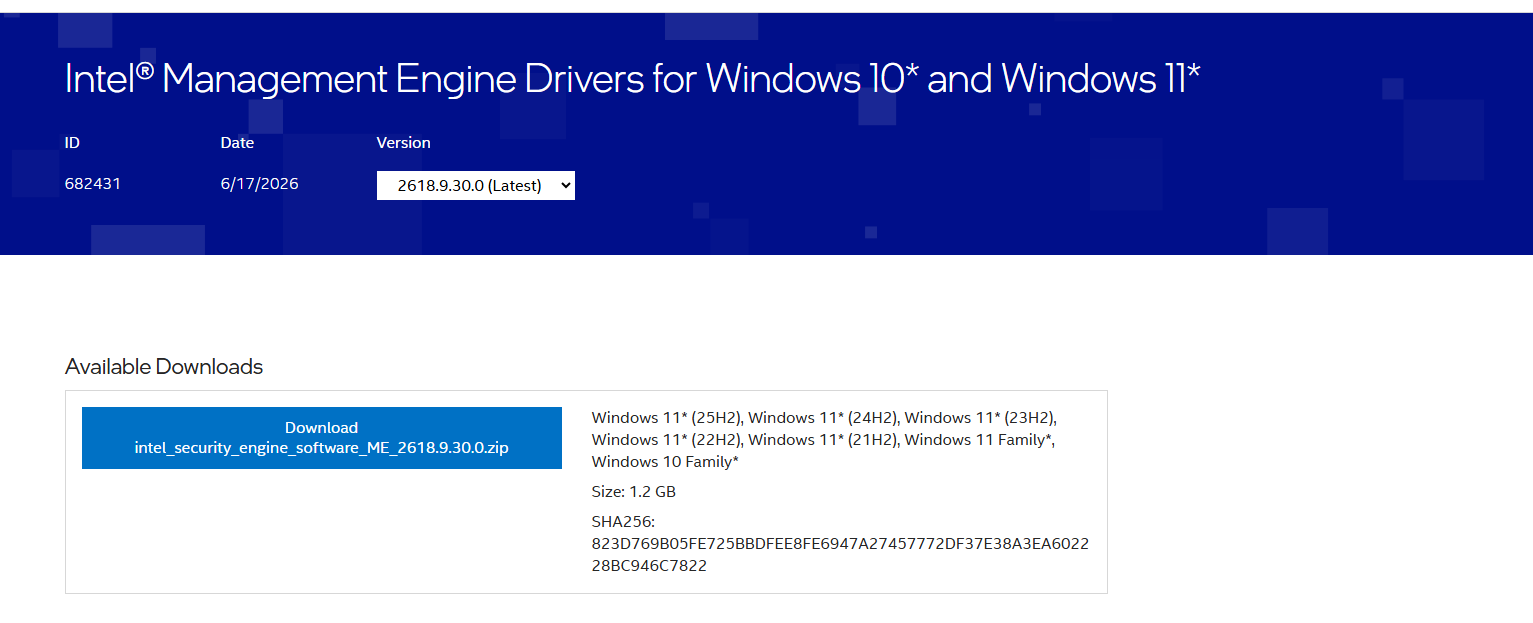
Go to the official Intel Management Engine Drivers for Windows 10 and Windows 11 download page and download the latest MEI driver package. Confirm that your processor generation and Windows version are listed as supported before downloading.
Click Download for the current driver ZIP package.
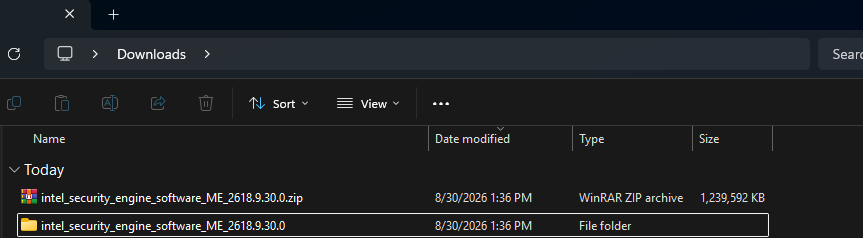
When the download finishes, right-click the ZIP file and select Extract All. Open the newly extracted folder rather than running files from inside the ZIP archive.
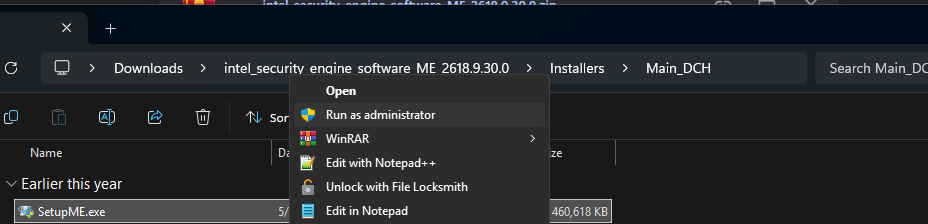
Inside the extracted folder, open Installers, then Main_DCH. Right-click SetupME.exe and select Run as administrator. Complete the installer and restart Windows if prompted.
Important: The MEI driver installed above is not the same as Intel ME firmware. Update the model-specific firmware separately using the following steps.
Update the model-specific Intel ME firmware
- Open the model's BIOS & Firmware page and find the newest entry named Intel ME, ME Firmware, or ME Update Tool. Download the latest stable version supplied by the motherboard or PC manufacturer.
- Read the BIOS notes before installing. On some newer Intel motherboards, the BIOS update also installs the matching ME firmware. Follow the instructions shown on your model's support page.
- Extract the downloaded ME ZIP file, close all running applications, and double-click MEUpdateTool.exe. Approve the update and wait for it to finish without shutting down the PC.
- Click OK when the tool finishes and restart the computer. You can verify the new ME FW Version from the BIOS main page in Advanced Mode.
For ASUS Intel motherboards, follow the official ASUS Intel Management Engine firmware update instructions. If your system is from another manufacturer, use that manufacturer's support page and update utility.
Step 3: Download and prepare the latest ASUS BIOS
First, confirm your exact motherboard model in MSINFO32 or on the BIOS main screen. Never use a BIOS made for a different model, even if the model names look similar.
- Open the ASUS BIOS & Firmware page for your exact motherboard. The board shown in this guide is the ROG Strix X670E-F Gaming WiFi. At the time of writing, its latest stable release is BIOS 3902, dated July 16, 2026. If ASUS lists a newer stable, non-beta release, use that version instead.
- Click Download beside the latest stable BIOS. ASUS downloads the BIOS as a compressed ZIP file.
- In File Explorer, right-click the downloaded ZIP file and select Extract All, then click Extract. Do not try to use the files while they are still inside the ZIP archive.
- Open the extracted folder. It should contain a BIOS file ending in .CAP and the ASUS renaming tool named BIOSRenamer.exe.
- Double-click BIOSRenamer.exe. A Command Prompt window will open and automatically rename the BIOS file for your motherboard. When it reports that the file was renamed successfully, press any key to close the window. For the ROG Strix X670E-F Gaming WiFi, the renamed file is SX670EF.CAP.
- Prepare a USB drive formatted as FAT32. Formatting erases the drive, so back up anything important first.
- Copy the renamed .CAP file—not the ZIP file and not BIOSRenamer.exe—to the root of the USB drive. The root means directly on the drive, outside any folder.
ASUS requires the correctly renamed file for USB BIOS FlashBack. This guide uses the same prepared .CAP file with ASUS EZ Flash 3. See the official ASUS BIOSRenamer and USB BIOS FlashBack instructions for additional model-specific details.
Step 4: Update the BIOS with ASUS EZ Flash 3
Important: Download the BIOS made specifically for your motherboard model from the manufacturer's support page. Extract the BIOS file to a FAT32-formatted USB drive. Back up your BitLocker recovery key and suspend BitLocker before continuing. Keep the PC connected to reliable power, and never turn it off during the update.
Restart the PC and enter the UEFI BIOS by pressing Delete or F2 during startup. If the BIOS opens in EZ Mode, press F7 to enter Advanced Mode.
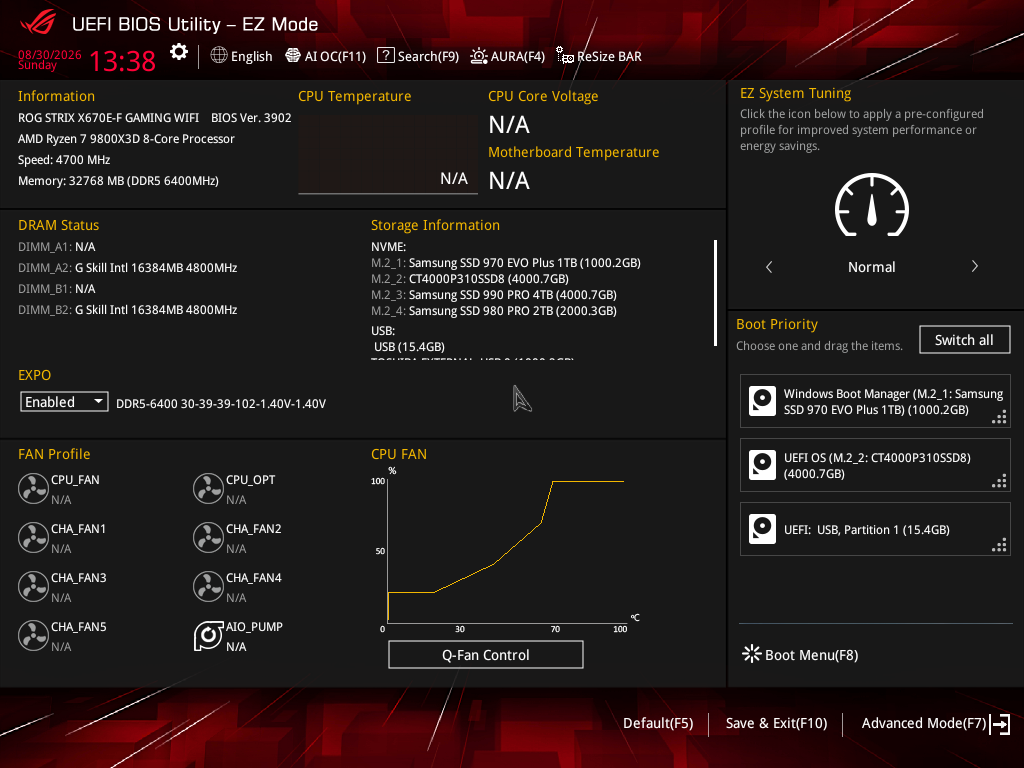
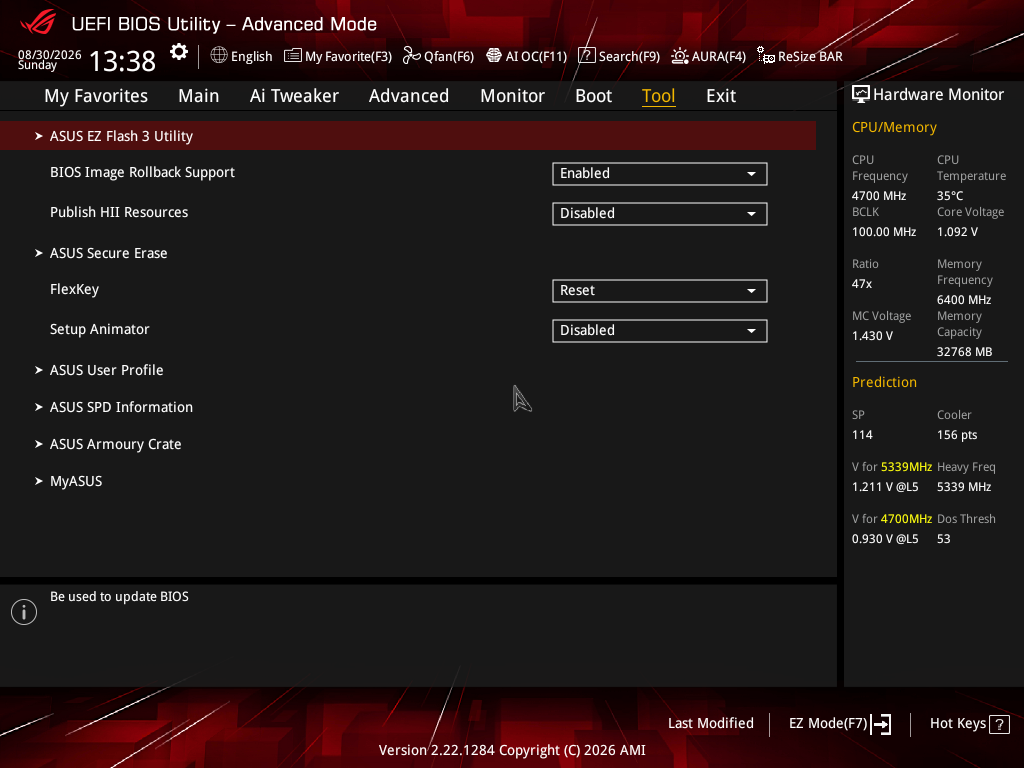
Open the Tool tab, then select ASUS EZ Flash 3 Utility.
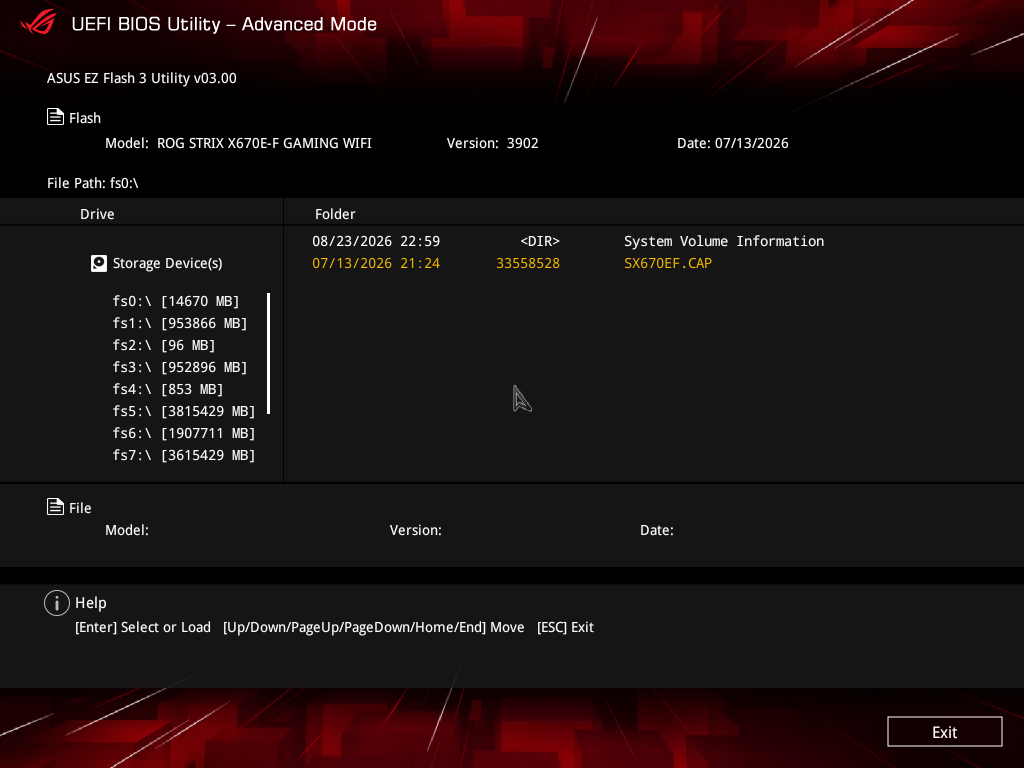
Select the USB drive that contains the extracted BIOS file, then choose the correct .CAP file. Check that the motherboard model, BIOS version, and date are correct before proceeding.
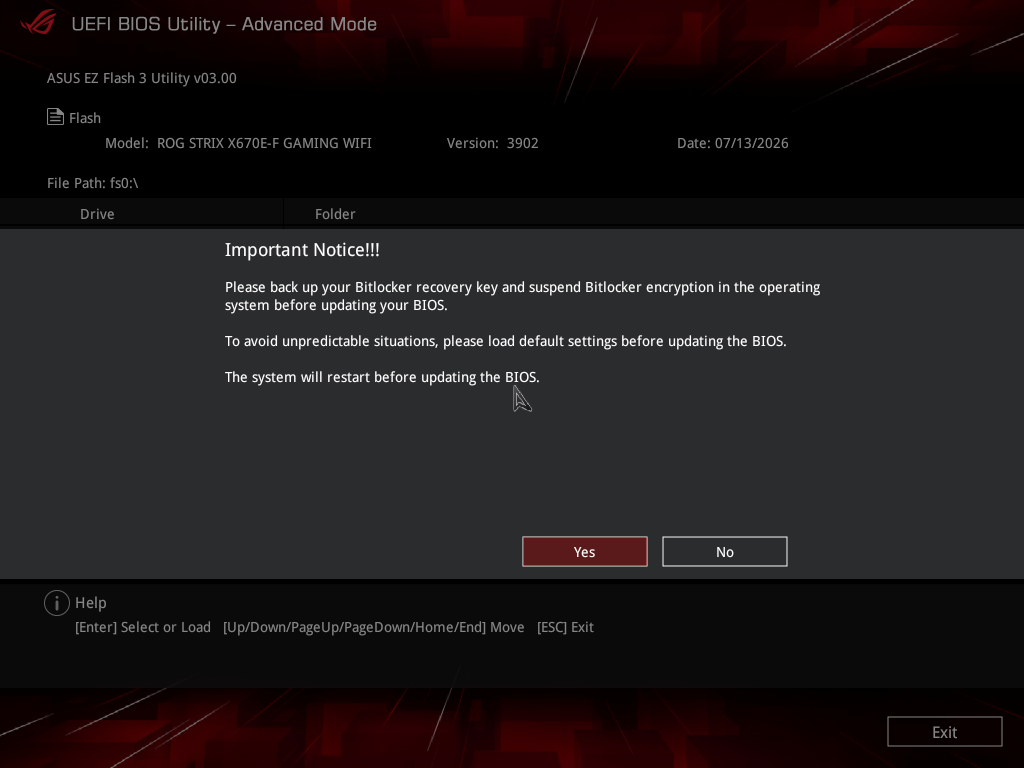
Read the warning carefully. Confirm that your BitLocker recovery key is backed up, BitLocker protection is suspended, and you are ready for the BIOS settings to return to their defaults. Select Yes to continue.
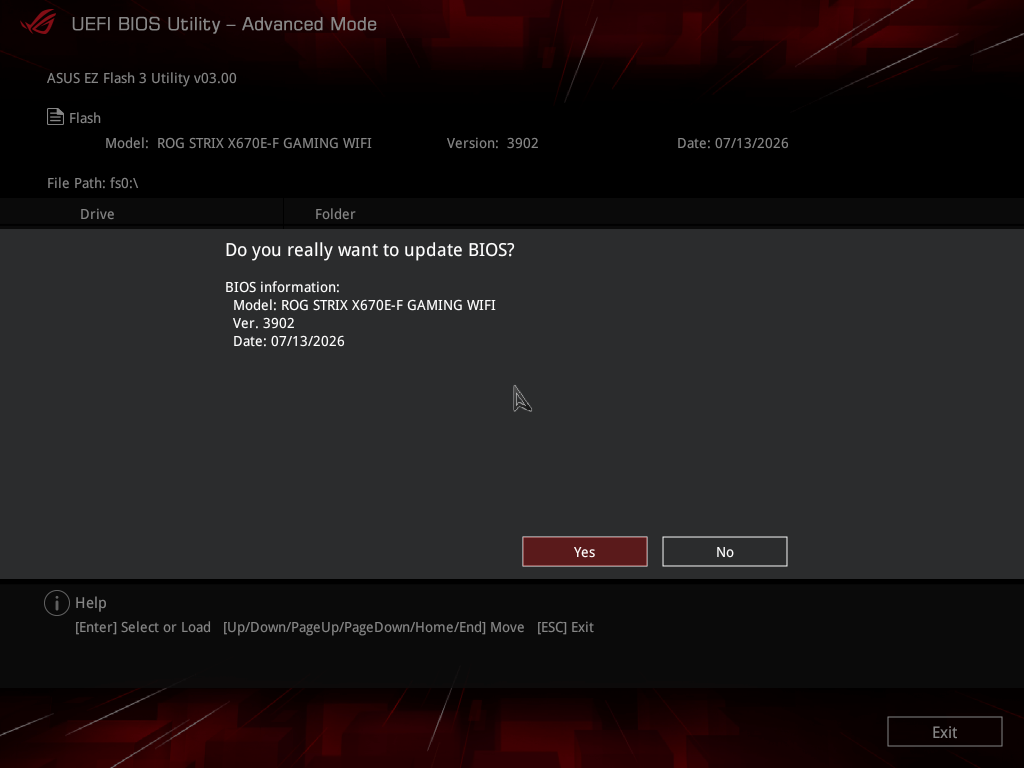
Review the motherboard model, new BIOS version, and release date one final time. If everything matches your motherboard, select Yes to start the update.
Wait for the update to finish. The PC may restart more than once. Do not turn off the PC, unplug it, or remove the USB drive while the BIOS is being updated. Menu names differ between motherboard manufacturers, so consult your motherboard manual if you are not using ASUS EZ Flash 3.
Step 5: Install TPM Diagnostics and retrieve the EK certificate
After booting back into Windows, open Command Prompt as an administrator and run:
DISM /Online /Add-Capability /CapabilityName:Tpm.TpmDiagnostics~~~~0.0.1.0This process can take some time, so be patient.
When it finishes, run the following command:
TpmDiagnostics.exe InstallEkCertThroughCoreProv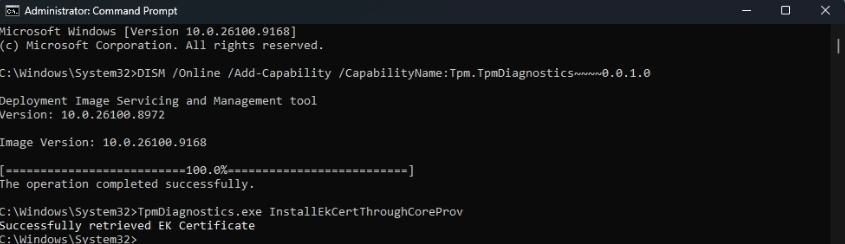
If you see Successfully retrieved EK Certificate, the process completed successfully.
Next, run the following command in the same administrator Command Prompt:
tpmtool getdeviceinformationReview the output and compare the key status lines with the example below.
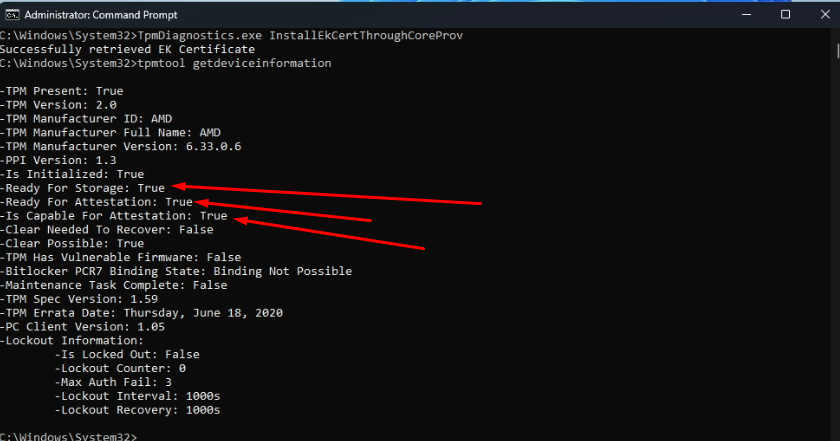
If your results show Is Initialized: True, Ready For Storage: True, Ready For Attestation: True, and Is Capable For Attestation: True, your TPM is configured correctly.
That's it. Restart your PC to finish.
Frequently asked questions
Why does Call of Duty say “BIOS Firmware Update Required”?
The Call of Duty Secure Attestation Wizard checks whether your BIOS, TPM 2.0, Secure Boot, and Windows security configuration meet the game's requirements. This warning means a newer motherboard firmware may be needed for continued compliance.
Can I install a BIOS made for a similar motherboard?
No. Install only the BIOS released for your exact motherboard or PC model and hardware revision. Using the wrong firmware can prevent the system from booting.
Is the process different for AMD and Intel systems?
Yes. AMD systems should use the current AMD chipset package from the motherboard manufacturer. Intel systems use an Intel MEI driver and model-specific Intel ME firmware. The BIOS itself must always match the exact motherboard.
How do I verify the fix?
Run tpmtool getdeviceinformation and confirm that storage and attestation are ready, then restart the PC and rerun the latest Call of Duty Secure Attestation Wizard. If the warning remains, check for a newer BIOS from your motherboard manufacturer.
Related guides: