
This CS2 FPS optimization guide shows you how to optimize Windows, clean-install NVIDIA drivers, configure FPS caps, tune launch options, and choose the best CS2 settings for smoother gameplay. This is a very simple guide that anyone can follow.
The goal is simple: improve CS2 performance, reduce stutter, clean up unnecessary background load, and build a stable setup for competitive Counter-Strike 2.
Before You Start
Before we jump in, it is important that you create a system restore point. Do not worry, nothing we are doing today is irreversible.
Creating a Restore Point

- Search for "restore point" in your Windows search bar.
- Click Create a restore point.
- Select your
Cdrive, then click Configure in the bottom right. - Select Turn on system protection, slide the bar to 10 GB, then click Apply and OK.
- Click Create, set a name for the restore point in the box, then click Create.
- Click
OK, then restart your PC.
Windows Updates
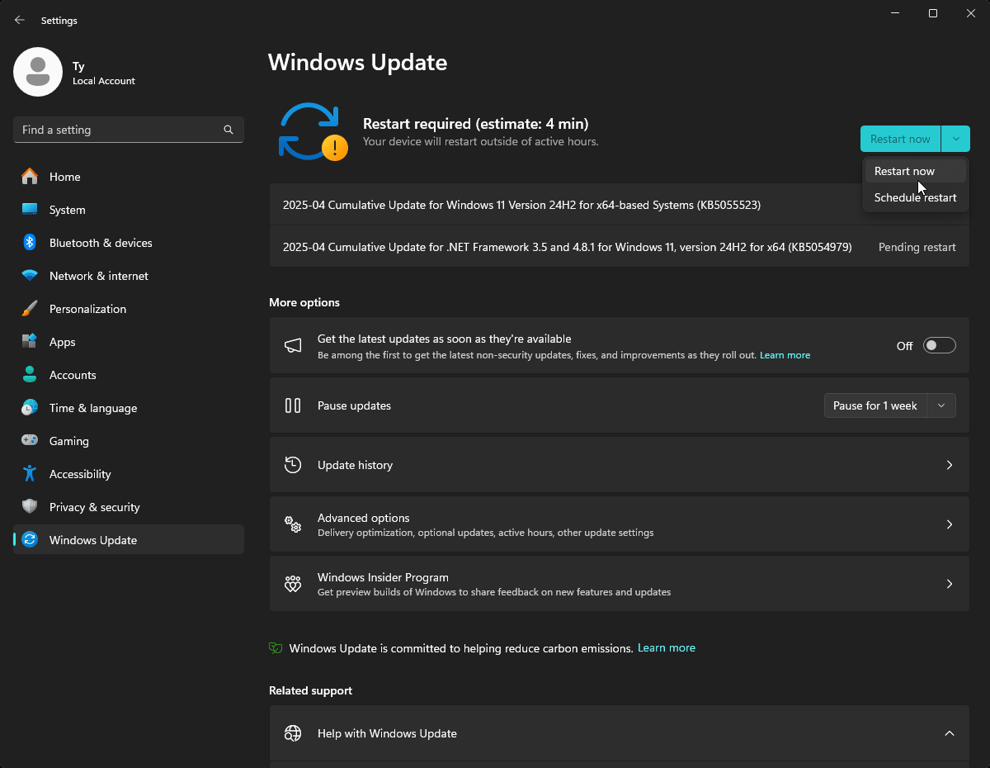
- Search for "Check for Updates" in Windows Search.
- Updates may take a few minutes, so please be patient while the installation processes.
- Once the updates are downloaded and installed, restart your PC.
FACEIT might still complain about missing updates. This is your sign to update to Windows 11 25H2. Here is how to do it.
Open CMD as administrator, then copy and paste the following text.
REG ADD "HKLM\SOFTWARE\Policies\Microsoft\Windows\WindowsUpdate" /f && REG ADD "HKLM\SOFTWARE\Policies\Microsoft\Windows\WindowsUpdate" /v TargetReleaseVersion /t REG_DWORD /d 1 /f && REG ADD "HKLM\SOFTWARE\Policies\Microsoft\Windows\WindowsUpdate" /v TargetReleaseVersionInfo /t REG_SZ /d 25H2 /fYou will see something like this.

Then, scan for updates again and wait for 25H2 to be installed.
Clean Up Your PC
- Download and install Malwarebytes, a free and very popular anti-malware solution.
- Click the Scan button after the installation is complete.

- The scan can take up to 30 minutes, depending on the speed of your PC and the number of files that need to be scanned.

- Once complete, you will either see that there are no threats and you can move on, or you will see Threat Scan results.
- Click Quarantine if you have items in your Threat Scan results.
- Restart your PC.
Custom Windows Power Plan
- Create a folder on your
C:\drive and name itFPSHEAVEN_TUTORIAL. - Download the FPSHEAVEN2026 power plan and unzip the files into the newly created folder. The link will automatically start the download.
- When you extract the ZIP to the
FPSHEAVEN_TUTORIALfolder, it should look like this:

- Open Command Prompt and enter the following command:
powercfg -import "C:\FPSHEAVEN_TUTORIAL\FPSHEAVEN2026.pow". - Enter
powercfg.cpl. - In the newly opened window, select the
FPSHEAVEN2026power plan. - Reboot your PC.

Windows Cleanup
Next, we are going to clean up your Windows install by removing temporary files and running Disk Cleanup.
Delete Temp Files
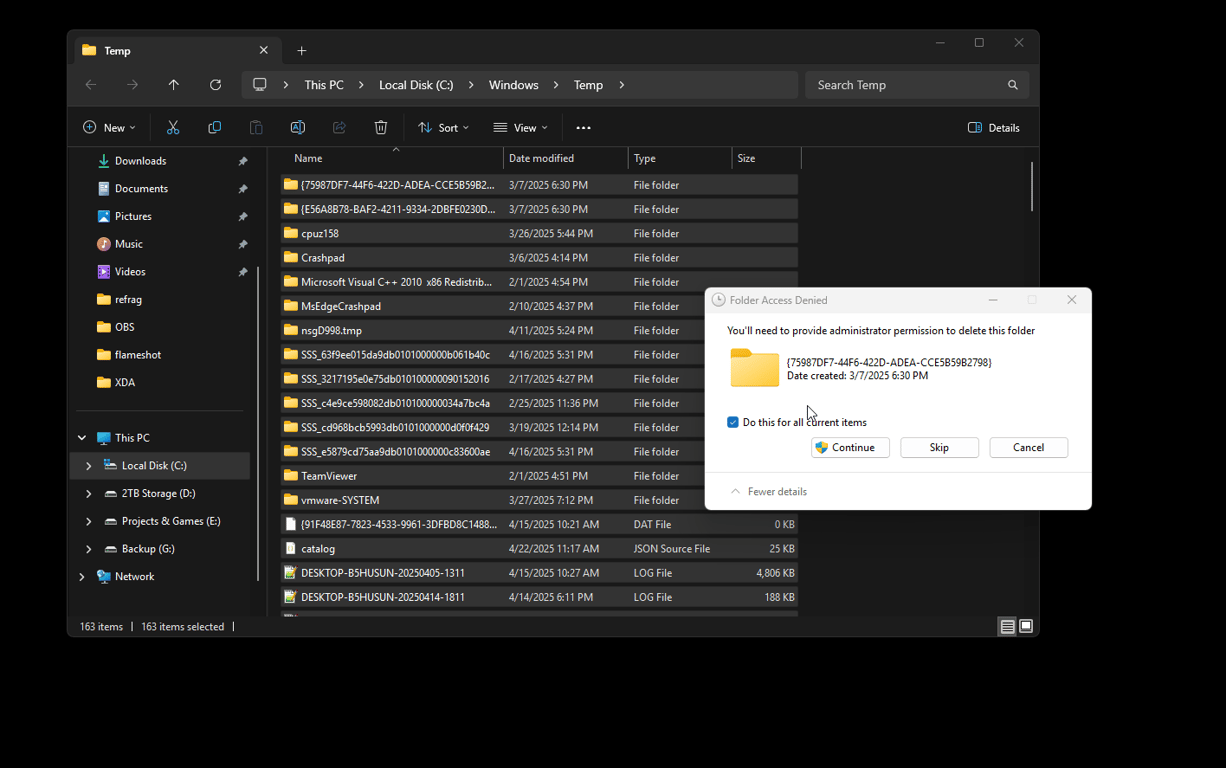
- Press Windows key + R on your keyboard to open Run.
- Enter
C:\Windows\Tempand clickOK. - Select all the files in the folder by selecting a random file and pressing CTRL+A on your keyboard.
- Press your Delete key.
- Tick the Do this for all current items box and click Skip.
- Repeat the process for the AppData Temp folder by entering
%temp%into Run.
Some items may not delete. This is fine, and you can proceed to the next step.
Disk Cleanup
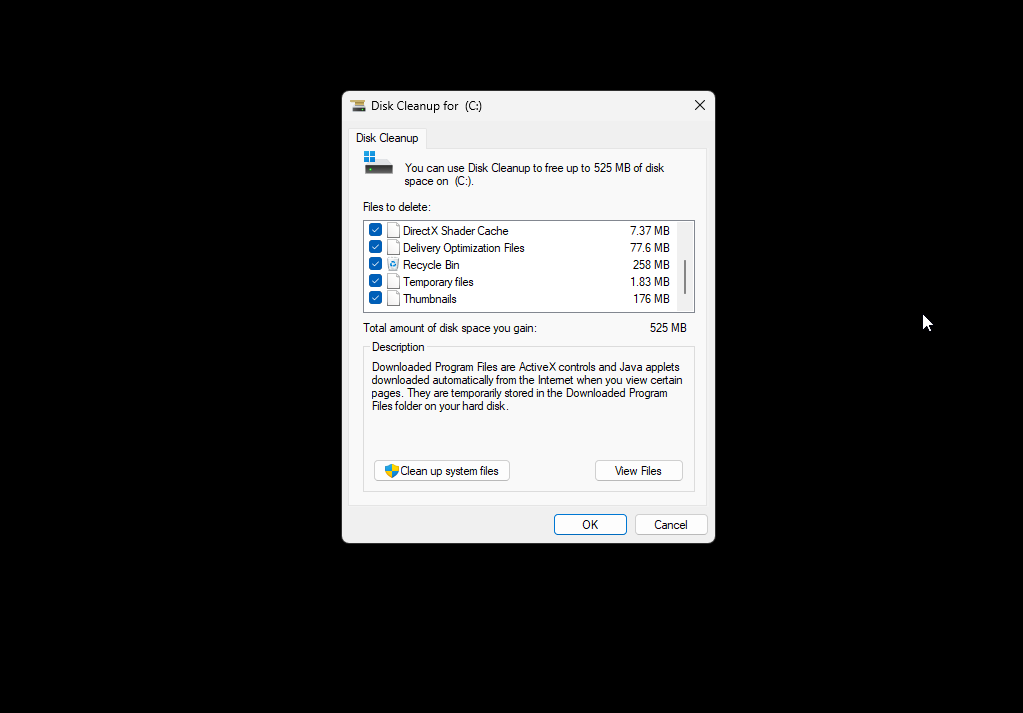
- Press Windows key + R on your keyboard to open Run.
- Paste
C:\Windows\System32\cleanmgr.exeand clickOK. - Select the
C:\drive and click OK. - Tick every box, click OK, then click Delete Files.
Cleaning System Files
- Press Windows key + R on your keyboard to open Run.
- Paste
C:\Windows\System32\cleanmgr.exeand clickOK. - Click Clean up system files.
- Choose what you want to clean. Most people select everything.
- Click
OK. This process might take a bit longer, so be patient.
Disable Startup Apps
Disabling unnecessary startup apps can reduce background load and make CS2 run smoother.
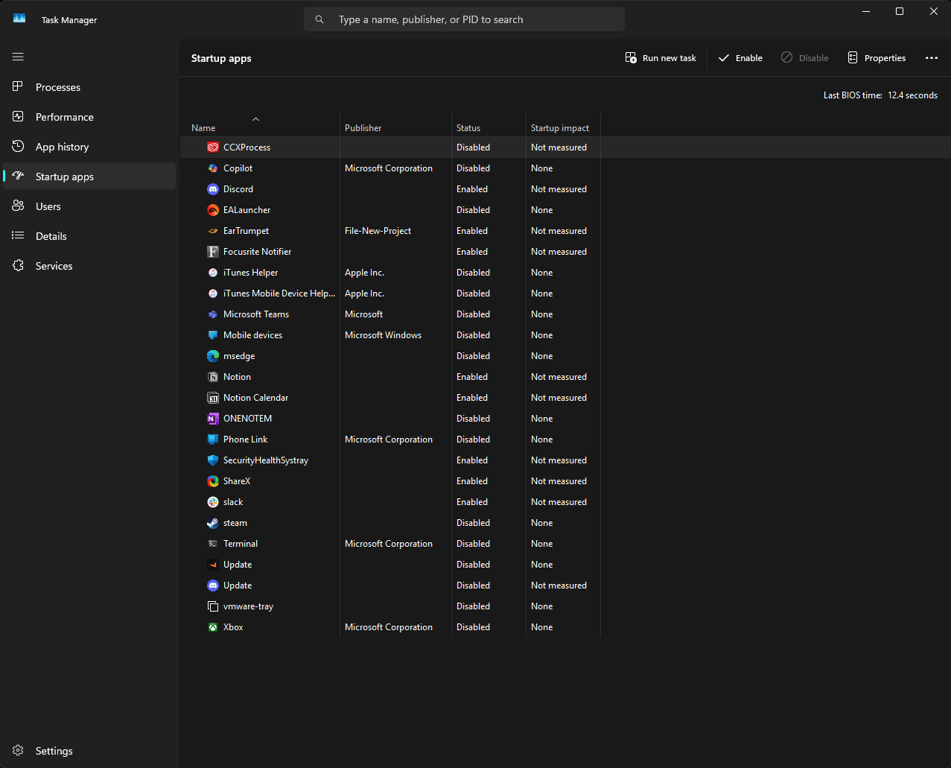
- Press
CTRL+SHIFT+ESCto open Task Manager. - Select the
Startuptab. - Right-click the programs you do not want running on startup, then click Disable.
Remove Unused Apps
To remove apps, we will use Geek Uninstaller. You can download Geek Uninstaller from the official website. This will download a ZIP file. Extract it and move geek.exe to our folder again. Run the app and start double-clicking apps you do not need.
For example, I want to remove REAL VNC.

I will double-click it, follow the uninstallation process, and then clean the remaining entries.

You can also remove Microsoft apps by clicking View and then Show Microsoft Store Apps.

The removal logic is the same: find the app you do not want to keep and double-click it.

GPU Driver Removal with DDU
A clean GPU driver setup is one of the most important parts of this CS2 FPS optimization guide. We will remove the old driver first, then install a clean driver package.
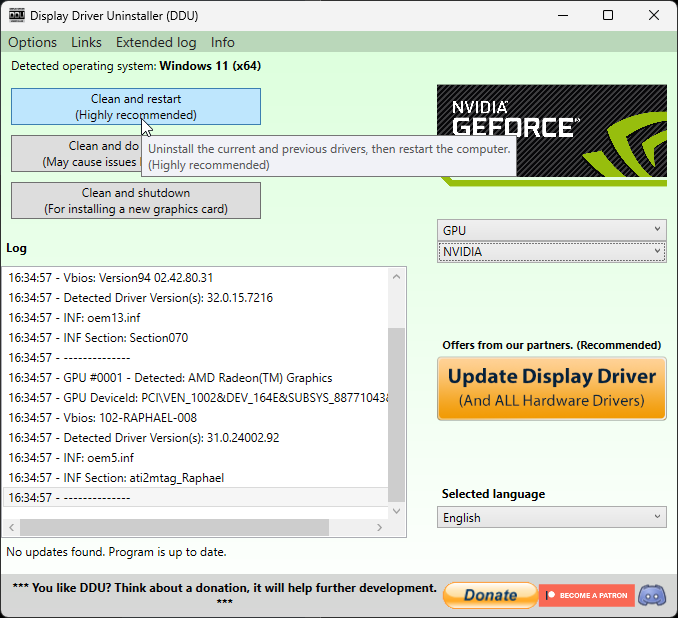
- Download DDU (Display Driver Uninstaller).
- Open the ZIP and run the EXE. Then, you will see this:

- Paste the following text inside the bar and press EXTRACT.

- Go to the
FPSHEAVEN_TUTORIALfolder, find Display Driver Uninstaller, and run it. - In the settings menu, make sure to check the settings highlighted in the image.

Clean GPU Driver Install
Next, we are going to install new GPU drivers using a utility called NVCleanInstall. If you have an AMD or Intel GPU, simply install the latest Radeon drivers or Intel Arc drivers respectively, and skip this step along with the Profile Inspector step.
- Download and install NVCleanInstall, which lets you customize and install the NVIDIA driver package.
- Open the program and select Manually select a driver version.
- Select the latest driver and make sure it says
64-bit Desktop. - If you are on a laptop, select
64-bit Notebook. - Click
Next, do not tick any options, and then clickNextagain. - Copy the settings you see below on the Installation Tweaks screen, then click
Next.


Click Next, then Install, and wait for the installation to complete. When the installation is complete, you will see an error. Ignore it and reboot your PC.
CS2 NVIDIA Settings with NVIDIA Profile Inspector
These CS2 NVIDIA settings are applied through NVIDIA Profile Inspector. The goal is to import a CS2-specific profile and avoid changing the NVIDIA 3D section afterward.
- Download NVIDIA Profile Inspector by orbmu2k and our CS2.nip file. Both files will auto-download.
- Extract both ZIP files to the
FPSHEAVEN_TUTORIALfolder, opennvidiaProfileInspector, and click the button pointing at Import Profile(s).
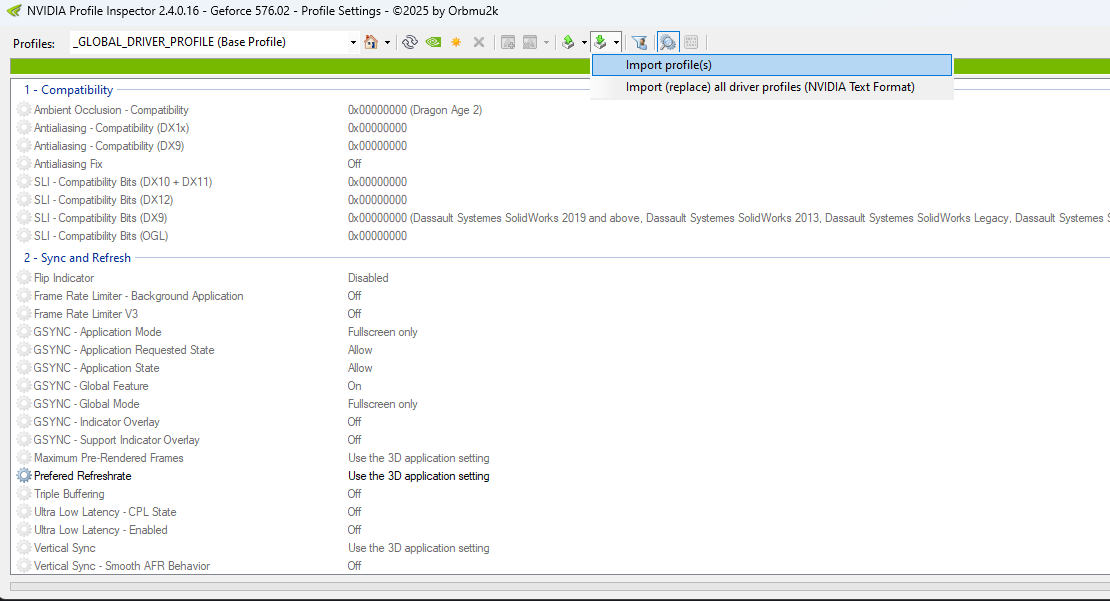
- Find and select
CS2.NIP, which is located in theFPSHEAVEN_TUTORIALfolder.

- You will see a Profiles successfully imported pop-up.
- Then click Apply Changes in the top right.
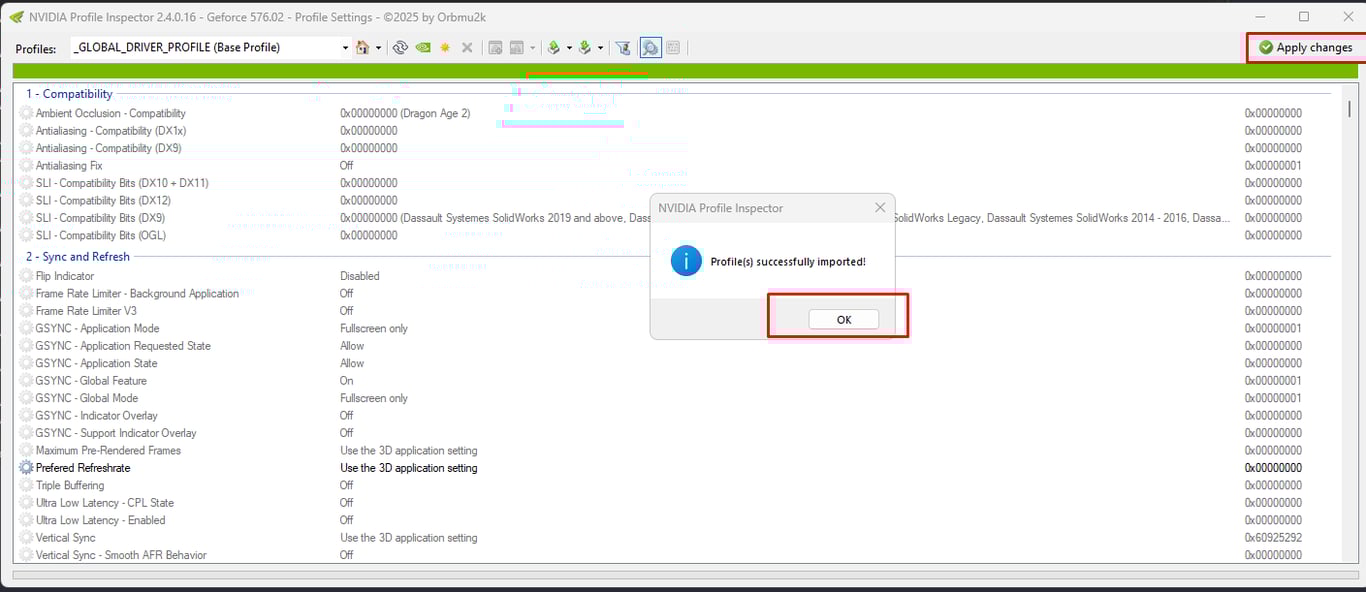
- This profile has settings specific to CS2.
- DO NOT change anything in the 3D section of NVIDIA. This will revert what we just did.
FPS Cap
Important: Before you proceed here, please read the following paragraph carefully.
When we force a driver-level or RTSS-level framerate cap, we need to think about our goal. If our goal is to have the lowest latency possible, then we must not cap our framerate. It comes down to two options.
- Use
-noreflexand a framerate limiter to get flat frametimes and a flat framerate. - Use
fps_max 0and Reflex on to get as many frames as possible, which will result in lower latency.
The only reason you should cap your framerate this way is if you cannot sustain a high enough framerate or your 1% average FPS is too low.
Here is how you implement the NVIDIA framerate limiter.
- Open the NVIDIA Control Panel and navigate to Manage 3D Settings.
- Click Program Settings.
- Find CS2 in the drop-down menu and select it. If you cannot find it, click Add and locate the CS2.exe executable from the Steam directory. It is normally located at:
C:\Program Files (x86)\Steam\steamapps\common\Counter-Strike Global Offensive\game\bin\win64\cs2.exe - Scroll down, locate Max Frame Rate, and then select a value.
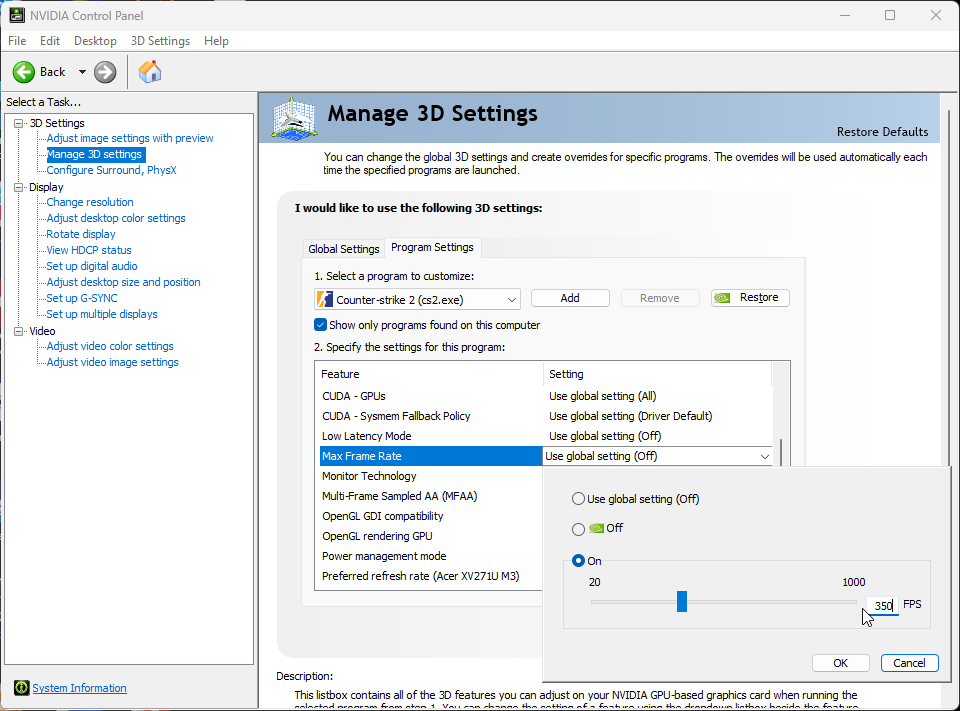
Finding this value is relatively easy. Queue up for a competitive match and take note of your average framerate. Pick a value slightly below your average framerate. For example, if you average 280 FPS, lock the framerate to 250 FPS. Take note of your new average FPS. This can take some trial and error, so if you are not happy with how things feel, increase or decrease the cap by 10 FPS at a time to dial it in.
Remember to add
-noreflexto your launch options and usefps_max 0inside CS2 when using this limiter.
NVIDIA Scaling for CS2
Simple. If you are playing on a native resolution, use no scaling. If you are playing on a stretched resolution, set scaling to fullscreen and scale on the GPU.

CS2 Launch Options
These CS2 launch options are not mandatory, but they can be useful depending on your system and FPS cap setup.
-noreflex only if you use a frame limiter like NVIDIA's or RTSS.
-threads 9 if you have 8 physical CPU cores.
The thread logic is easy: take the number of physical cores you have and add 1.
- 14900K has 8 P-Cores, so
-threads 9. - 9800X3D has 8 cores, so
-threads 9.
-mainthreadpriority 2 raises the game's main thread to a higher priority. Keep in mind that if you are on an older CPU, this might cause some stuttering.
You can also use no launch options. They are not mandatory.
CS2 Settings
Boot up CS2 and head to the video settings. This section covers the best CS2 settings for FPS while keeping the game playable and readable.
The screenshot below is tuned for performance while still looking decent. You do not have to copy it exactly, but one thing is non-negotiable: always set Dynamic Shadows to ALL. Skipping this actually hurts visibility.
For MSAA, 2X or CMAA2 both work fine. We personally run 4X because our system can handle it and it makes the game look less pixelated.

Too Much Work?
Let us tune your system, including Windows and BIOS settings, at fpsheaven.com/services. We recently introduced TinyBoost, our best value-for-money service. Let us take care of your system and help you focus on winning some ELO.
Join the Community
If you have questions about this guide, feel free to join our Discord and ask: https://discord.gg/DjCRn9WTK.